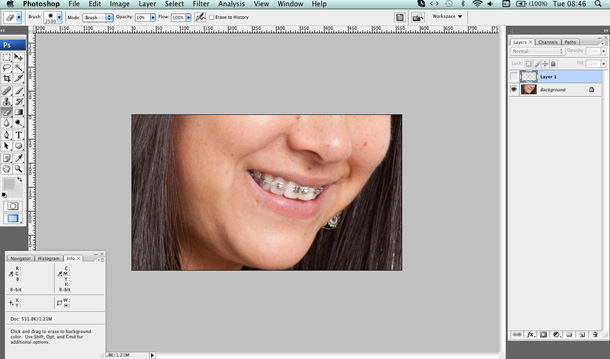
Open the image in Photoshop CS; you want to clean up. If you are not familiar with how to open a file in Photoshop, then We suggest you visit our Clipping Path Tutorial and learn how to open. In this retouching tutorial, we will use the face of a model to remove sports, brightness, and chain on teeth.
1. Photo Retouching Tutorial in Adobe Photoshop
First, create a new blank layer. Click on the last second icon in the layer palette. We will do retouching on the second transparent layer so, the original image will be untouched. This way we will be able to compare the original image and retouching area.

Following the same procedure, we create another layer for brightness retouch. One thing we would like to mention that you can retouch directly to the original background layer. We presume you do not have skill with Photoshop, so we suggest for the second layer to use. Eventually, you will have the opportunity to redo only the retouching part you have done.

Again go to the toolkit from left Tools and select Clone Stamp Tool. This Clone Stamp is one of the best tools in Photoshop uses when retouching task is applied. Anyway, after selecting this tool, press Alt on the keyboard and click the skin nearest the spot area simultaneously. After that again hold the alt key and click on the spot portion and drag mouse entire sports area. By this way, the spot will go away from the skin.
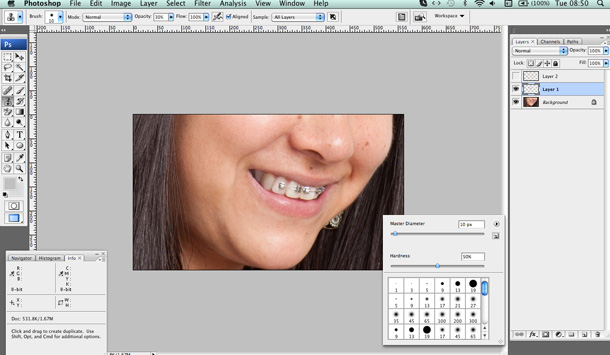
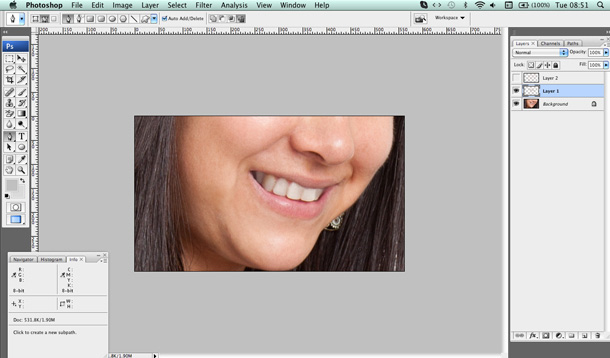
Please see the screenshot of this dialog box. Our experience says neither too much hardness or softness is excellent to use with Clone Stamp Tool. You need to try by applying different possible sharpness and decide which might work for your image. Also, you can maximize or minimize the mouse pointer during photo retouching. We suggest you make the mouse pointer size a slightly bigger than the spot area then you can control the pointer more accurately. Eventually, the retouched image will look like the below screenshot.
Again, we follow the same procedure to clean up the brightness. Finally, save the image in .psd or any other Photoshop file format.
Hoping that the core retouching tutorial will give an idea of how the cleanup or image retouching process happens. If you want retouching service from us, then apply for a Free Trial. We are open 24-hours.
2. Tips & Tricks To Fix The Photo By Just Choosing Photo Retouching Services
What could be the most valuable accessories of a designer? Its confidence! And they get confidence through the most useful features of Photoshop. Trust me; it has settled the life of so many people. If you are not a designer, don't worry! You can still create your masterpiece work by the Photo Retouching Services.
1. Increase the natural light: If your image is looking dull and needs some sunlight, then you are at the correct place. To do this press Shift+Ctrl+N or click on Layer -> New -> Layer. Now set the opacity to about 15%-30% and blending mode to "Colour Dodge." 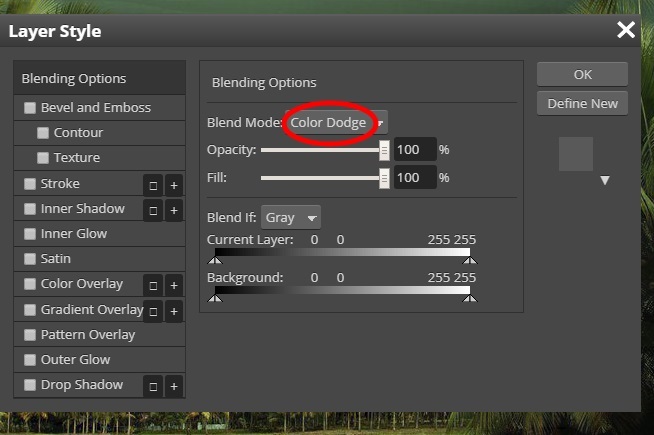
Use the soft brush under the brush tool, and to pick up the colours, hold the Alt/Option, from the area you want to brighten. After using the brush, in the Overlay Mode, use the second Layer. You can get a more realistic look.
2. Levels at work: If you want to have a black & white touch to your image, then Level is an excellent option for you. Check out the before and after picture:
Original Image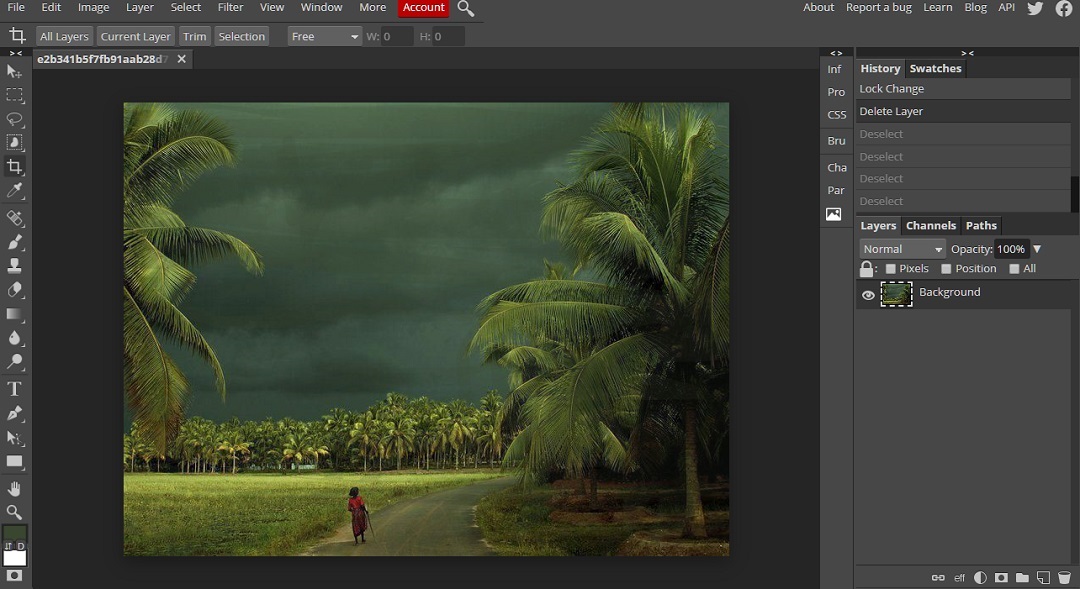
Now to give the black and white effect, you have to click on the Layer -> New Adjustment Layer -> Threshold. If you want to provide a great look, then you can drag the threshold button to the left side to decrease it and to increase pull it on the right-hand side.
Black & White image:
The resulting image will look like this one.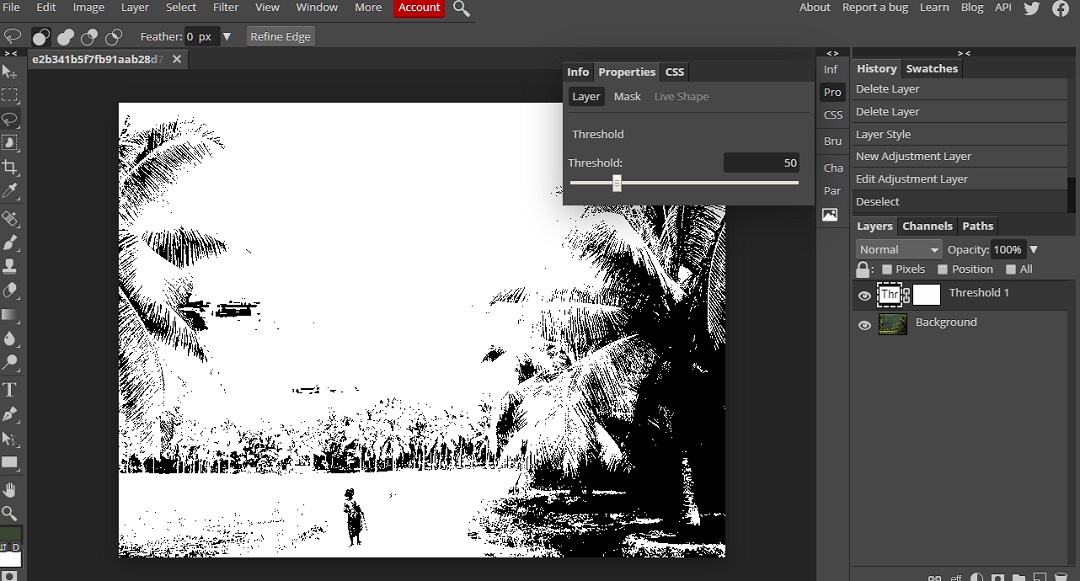
3. Use of Adjustment layer colours: You can change the colour of your image by this method. Click on the Layer menu -> New Adjustment Layer -> Hue/Saturation. Drag the option as per your requirement. Like I have given a night touch to my picture, for example, by increasing the Hue to 139, Saturation 28, and Lightness to -36. The result show below:
4. A sunset feeling: If someone has missed the sunrise and sunset in their life, then it's a wasted life. If you have failed to capture a sunset in your picture, no worries, Photoshop is here. It is the real image:
To give a sunset feeling to your image, click on the Layer -> Layer Style -> Gradient Overlay, and tada, your image will look like this:
When the Gradient Overlay opens, you have to choose the Gradient, which gives the sunset colour like a mixture of orange and purple, then choose your Blend Mode to Soft Light. You can select the Styles which suit your picture well.
5. Contrasts controlling: To control the contrast effect in your image, you have to click on the Filter -> Other -> High Pass and set the radius to 3px. Double click on the Layer next to open the layer style window and change the blend mode to "Overlay."
With these simple techniques, we can easily enhance our image by photo retouching services.


